Jim Musson's Web Site
| Home | Musson Sites | Photography | Hillsborough Weather | Build A Guitar | Champ Amps | WiFi Dog |
Server ConfigurationLog on Log on to the server with your username and password. Now type ifconfig
eth0 Link encap:Ethernet HWaddr 00:b0:d0:07:38:7d
inet addr:192.168.21.16 Bcast:192.168.21.255 Mask:255.255.255.0
inet6 addr: fe80::2b0:d0ff:fe07:387d/64 Scope:Link
UP BROADCAST RUNNING MULTICAST MTU:1500 Metric:1
RX packets:7268 errors:0 dropped:0 overruns:0 frame:0
TX packets:4829 errors:0 dropped:0 overruns:0 carrier:0
collisions:0 txqueuelen:1000
RX bytes:1772680 (1.7 MB) TX bytes:800203 (800.2 KB)
Interrupt:11 Base address:0xc00

lo Link encap:Local Loopback
inet addr:127.0.0.1 Mask:255.0.0.0
inet6 addr: ::1/128 Scope:Host
UP LOOPBACK RUNNING MTU:16436 Metric:1
RX packets:4102 errors:0 dropped:0 overruns:0 frame:0
TX packets:4102 errors:0 dropped:0 overruns:0 carrier:0
collisions:0 txqueuelen:0
RX bytes:657753 (657.7 KB) TX bytes:657753 (657.7 KB)
At this point I installed 2 programs on my Windows computer. PuTTY and WinSCP. The first provides a terminal window to the Ubuntu server, the second lets you see and edit the files graphically. Log on PuTTY using my username jim. Click Open  The first time you log on the key will need to be updated. Click yes.  Enter your username and password 
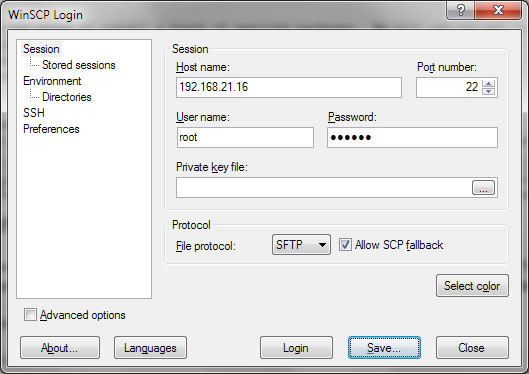
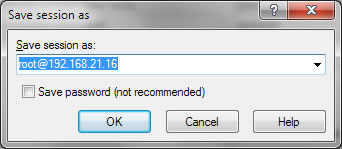
Using WinSCP to edit filesThis procedure uses WinSCP to find and edit files using a GUI interface. I find it much easier than using Nano. However it requires you to log to the server as the root user Set a password for the root user sudo passwd root Enter a password twice. Start WinSCP
Click Save
Click Ok. Then Click Logon
I set up my window in the explorer style. Install other required packagesWe are now going to install a bunch of required packages. We will use apt-get to
download and install them. sudo apt-get update (It will prompt for your password). Now install Apache & PHPsudo apt-get install apache2 php5 (You will be prompted about the increased disk usage, answer Y – that’s a capital Y).
Database Server InstallWiFiDog requires the POSTGRE database server. sudo apt-get install postgresql We will now edit 2 files so we have access to the database server from other
computers. sudo nano /etc/postgresql/8.4/main/pg_hba.conf Scroll down until you see these 2 lines # Database administrative login by UNIX sockets local all postgres ident Now add this line between them like this # Database administrative login by UNIX sockets host all all 0.0.0.0 0.0.0.0 md5 local all postgres ident This new line must be the first non comment line in the file. Type Ctrl-X to exit Now the 2nd file: sudo nano /etc/postgresql/8.4/main/postgresql.conf Change this line from: #listen_addresses = 'localhost' # what IP address(es) to listen on; to listen_addresses = '*' # what IP address(es) to listen on; Type Ctrl-X to exit Install nmapInstall nmap so we can check the database server sudo apt-get install nmap nmap localhost Starting Nmap 5.00 ( http://nmap.org ) at 2010-09-15 09:38 EDT Warning: Hostname localhost resolves to 2 IPs. Using 127.0.0.1. Interesting ports on localhost (127.0.0.1): Not shown: 996 closed ports PORT STATE SERVICE 22/tcp open ssh 25/tcp open smtp 80/tcp open http 5432/tcp open postgresql Nmap done: 1 IP address (1 host up) scanned in 0.37 seconds See port 5432. That shows the database is running and listening on that port. Now let’s check and see if you can see it on our IP address (the one we used when we
logged on with PuTTY).
sudo reboot Log back on using PuTTY nmap 192.168.21.16 We should see port 5432 open here too. If not, you didn’t edit the 2 files properly. Install PHP Add onssudo apt-get install php5-cgi sudo apt-get install php5-mhash php5-pgsql php-pear php5- xmlrpc php5-curl php5-mcrypt php5-dev Install Phlickrsudo pear install XML_RPC cd /tmp wget http://ovh.dl.sourceforge.net/sourceforge/phlickr/Phlickr- 0.2.5.tgz sudo pear install Phlickr-0.2.5.tgz rm Phlickr-0.2.5.tgz Install the auth server filesTo get the latest version of wifidog-auth we will need subversion: sudo apt-get install subversion Now get the WiFiDog Auth Server files svn checkout https://dev.wifidog.org/svn/trunk/wifidog-auth (Enter t)
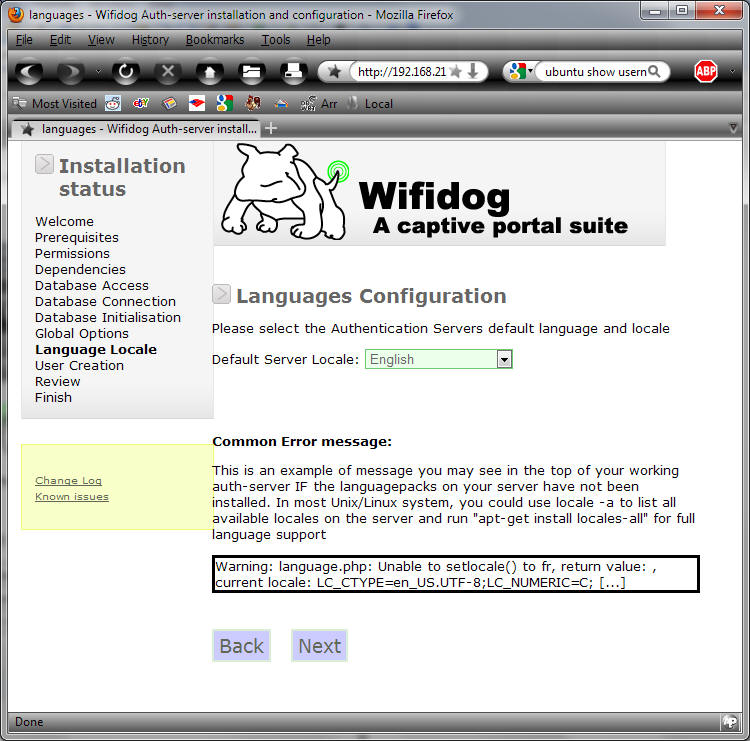
Move them to the web server directory sudo mv wifidog-auth/ /var/www/ Apache 2 configuration fileChange the document root of the web server to the location of the WiFiDog files sudo nano /etc/apache2/sites-available/default Change this line DocumentRoot /var/www/ to DocumentRoot /var/www/wifidog-auth/wifidog Restart Apache2: sudo /etc/init.d/apache2 restart Configure locale in wifidog.confIf you want translations in all the languages WiFiDog supports, you need to generate all the necessary locales. Here are various manual ways to do that, but unless your disk space is at a premium, the simplest way to do that on Ubuntu is to do the following: sudo apt-get install language-pack-bg-base language-pack- de-base language-pack-el-base - language-pack-es-base language-pack-fr-base language-pack-it-base language-pack- - ja-base-language-pack-pt-base language-pack-sv-base You may also want to change the default language for the portal page in the file config.php sudo nano /var/www/wifidog-auth/wifidog/config.php Change this line define('DEFAULT_LANG', 'fr_CA');
to define('DEFAULT_LANG', 'en_US'); (or whatever you use)
Install the postfix mail serverYou need to have a valid mailer in order to mail account confirmation. sudo apt-get install postfix Select the "internet site with smart host"
Enter the name of your auth server the computer we are configuring)
Configure the server to use a static IP addresssudo nano /etc/network/interfaces Change # The primary network interface from iface eth0 inet dhcp to iface eth0 inet static address 192.168.21.16 (using your ip address) netmask 255.255.255.0 (mask) gateway 192.168.21.1 (and gateway) Now check the dns servers sudo nano /etc/resolv.conf The file should look like this nameserver 4.2.2.1 (using your DNS entries and domain) nameserver 4.2.2.2 domain digserv.com search digserv.com Reboot the server and log back on using PuTTY using the static IP address.
Configure the auth serverAssign a password to the postgres usersudo passwd postgres Create WiFiDog usersu - postgres (use the password from the previous step) Make sure the prompt says postgres postgres@WiFiDogAuth:~$ createuser wifidog --pwprompt Enter a password twice. Then type n 3 times. Create the database filecreatedb wifidog --encoding=UTF-8 --owner=wifidog Edit the install.php scriptsu - jim (use your username) sudo nano /var/www/wifidog-auth/wifidog/install.php Remove the logon from install.phpChange these lines if ($page != 'Welcome') {
if (isset ($_SERVER['PHP_AUTH_PW'])) {
#echo "PHP_AUTH_USER=(" . $_SERVER['PHP_AUTH_USER'] . ") PHP_AUTH_PW=(" . $_SERVER['PHP_AUTH_PW'] . ")"; # DEBUG
if ($password == $_SERVER['PHP_AUTH_PW'])
$auth = true;
}
}
else
$auth = true;
to if ($page != 'Welcome') {
if (isset ($_SERVER['PHP_AUTH_PW'])) {
#echo "PHP_AUTH_USER=(" . $_SERVER['PHP_AUTH_USER'] . ") PHP_AUTH_PW=(" . $_SERVER['PHP_AUTH_PW'] . ")"; # DEBUG
if ($password == $_SERVER['PHP_AUTH_PW'])
$auth = true;
}
}
else
$auth = true;
$auth = true;
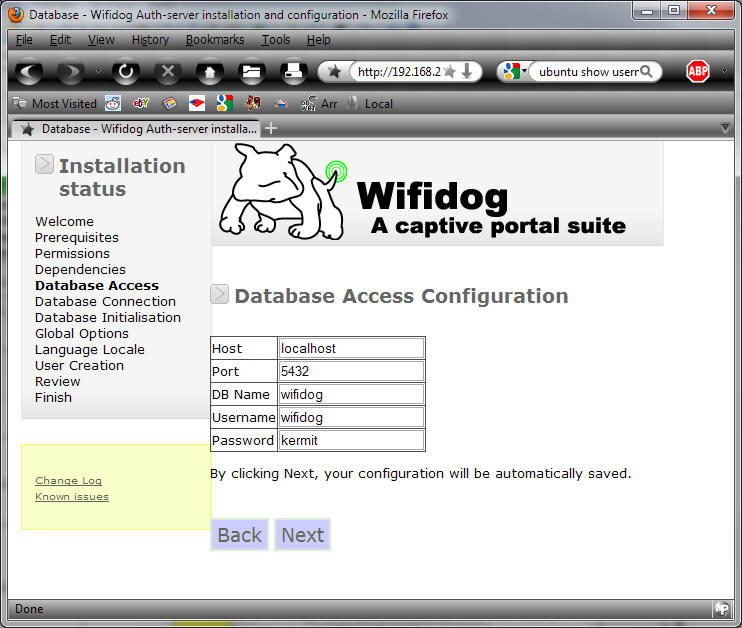
Change the postgre password to match the one you set above.sudo nano /var/www/wifidog-auth/wifidog/config.php // Password for database access.
define('CONF_DATABASE_PASSWORD', 'your password');
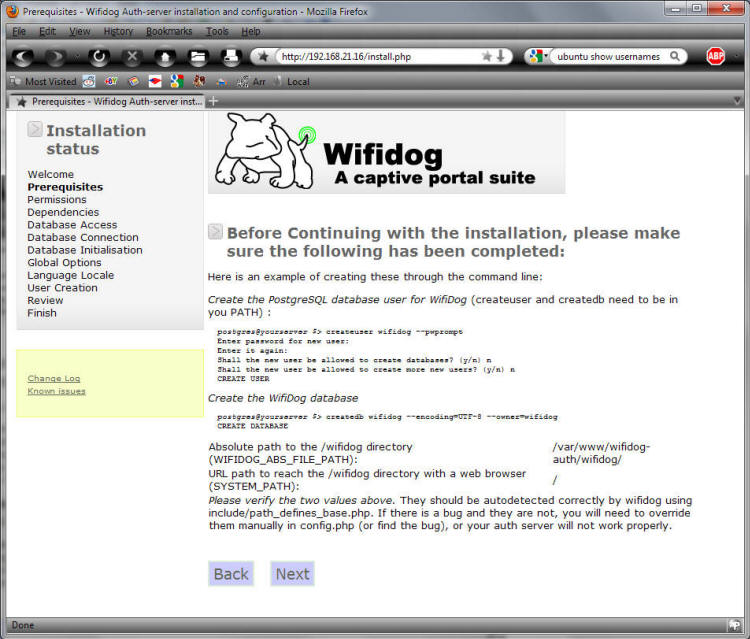
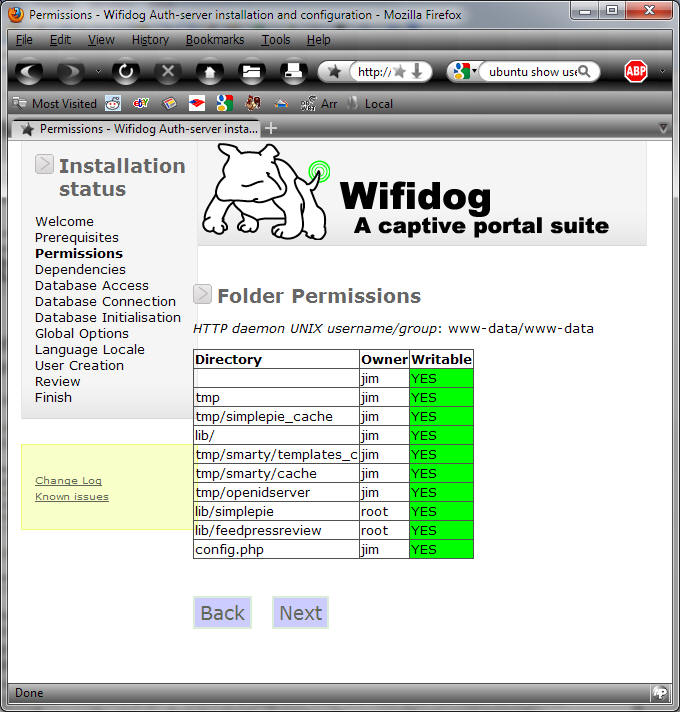
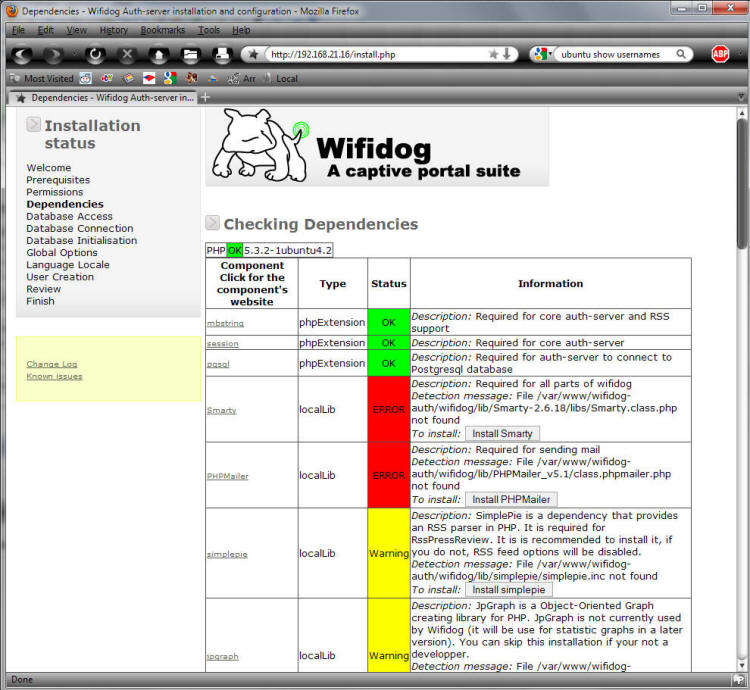
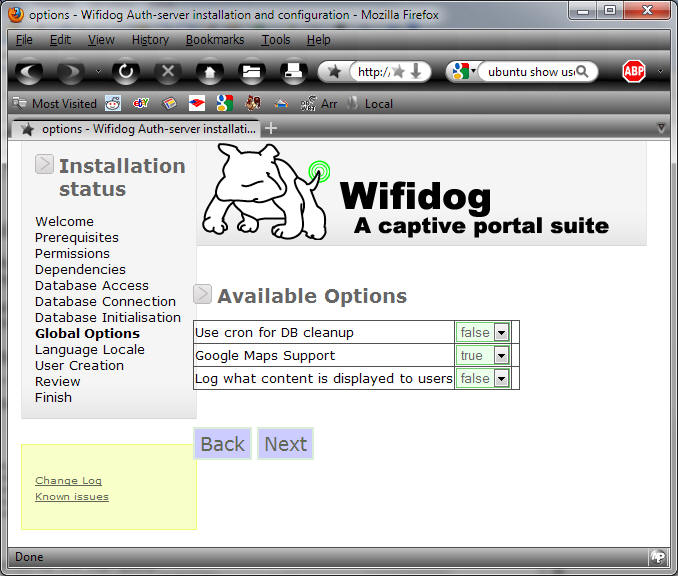
Change the email server settingsEven though it says don't change them. Create directories and change file permissionssudo mkdir /var/www/wifidog-auth/wifidog/tmp/simplepie_cache /var/www/wifidog-auth/wifidog/tmp/openidserver; sudo mkdir /var/www/wifidog-auth/wifidog/lib/simplepie /var/www/wifidog-auth/wifidog/lib/feedpressreview; sudo chgrp -R www-data /var/www/wifidog-auth/wifidog/ /var/www/wifidog-auth/wifidog/tmp; sudo chgrp -R www-data /var/www/wifidog-auth/wifidog/tmp/simplepie_cache /var/www/wifidog-auth/wifidog/lib/; sudo chgrp -R www-data /var/www/wifidog-auth/wifidog/tmp/smarty/templates_c; sudo chgrp -R www-data /var/www/wifidog-auth/wifidog/tmp/smarty/cache; sudo chgrp -R www-data /var/www/wifidog-auth/wifidog/tmp/openidserver /var/www/wifidog-auth/wifidog/lib/simplepie; sudo chgrp -R www-data /var/www/wifidog-auth/wifidog/lib/feedpressreview /var/www/wifidog-auth/wifidog/config.php; sudo chmod g+wx /var/www/wifidog-auth/wifidog/ /var/www/wifidog-auth/wifidog/tmp; sudo chmod g+wx /var/www/wifidog-auth/wifidog/tmp/simplepie_cache /var/www/wifidog-auth/wifidog/lib/; sudo chmod g+wx /var/www/wifidog-auth/wifidog/tmp/smarty/templates_c /var/www/wifidog-auth/wifidog/tmp/smarty/cache; sudo chmod g+wx /var/www/wifidog-auth/wifidog/tmp/openidserver /var/www/wifidog-auth/wifidog/lib/simplepie; sudo chmod g+wx /var/www/wifidog-auth/wifidog/lib/feedpressreview /var/www/wifidog-auth/wifidog/config.php; Run the installation scriptFire up your internet browser on your computer (not the server) and go to the static ip address you entered above and add install.php http://192.168.21.16/install.php Click Next Click Next All the Writable column values should be yes, if not there is a problem in
the creating directories and change permissions from above. You need to install Smarty and PHPMailer. Click on the install
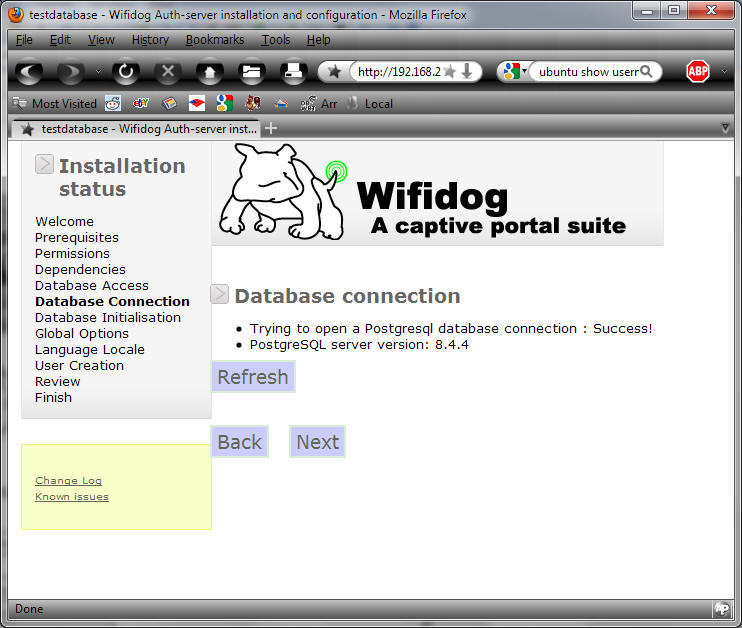
buttons. The status columns will turn green Make sure the database password matches what you entered Click Next. Database connection is successful. If not you can use a windows /
Linux program called pgAdmin III to test your database connection from another
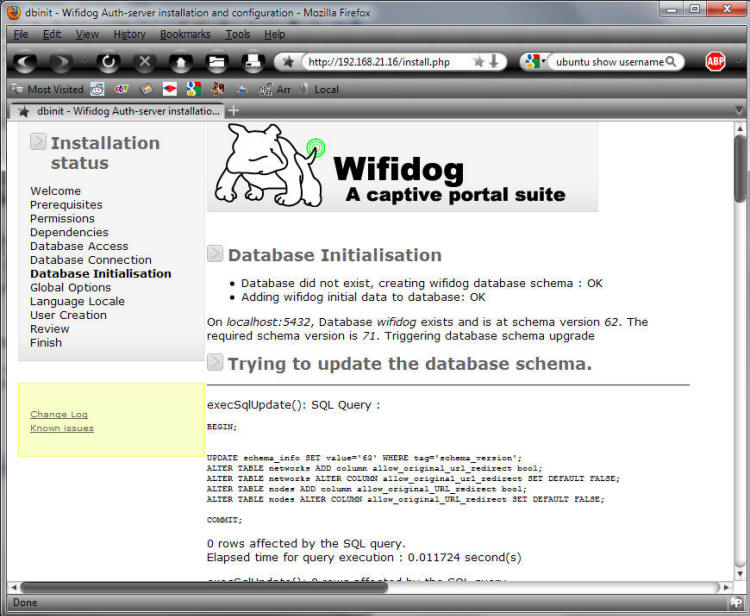
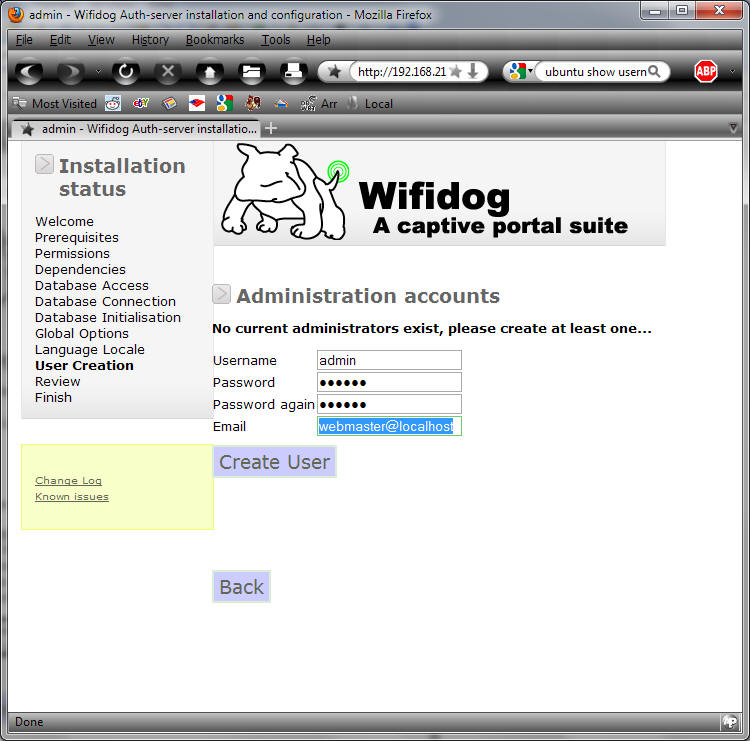
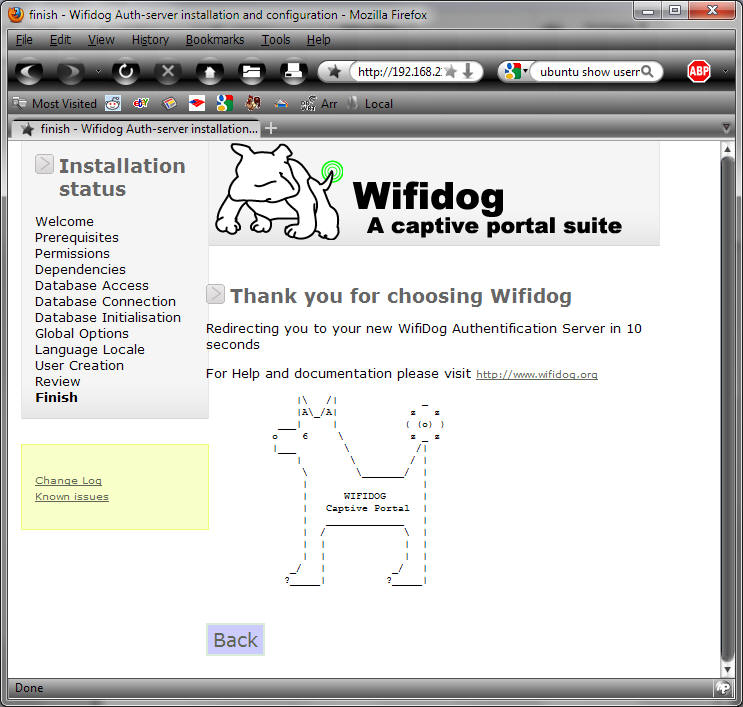
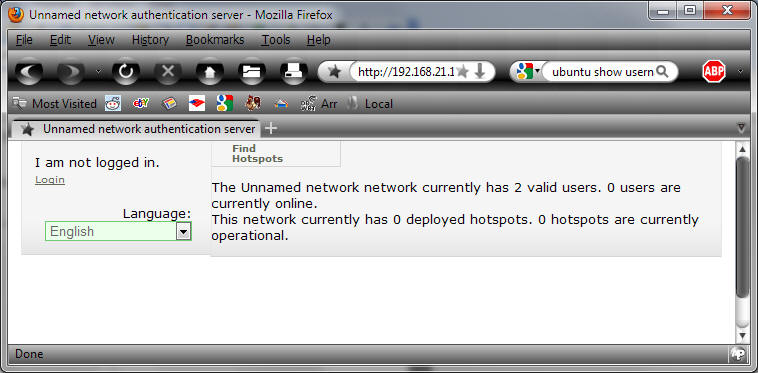
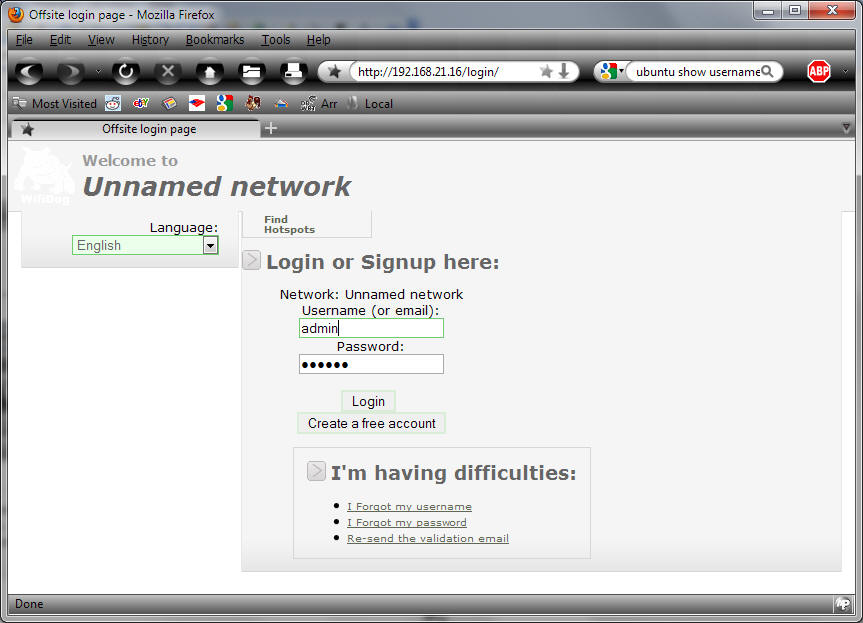
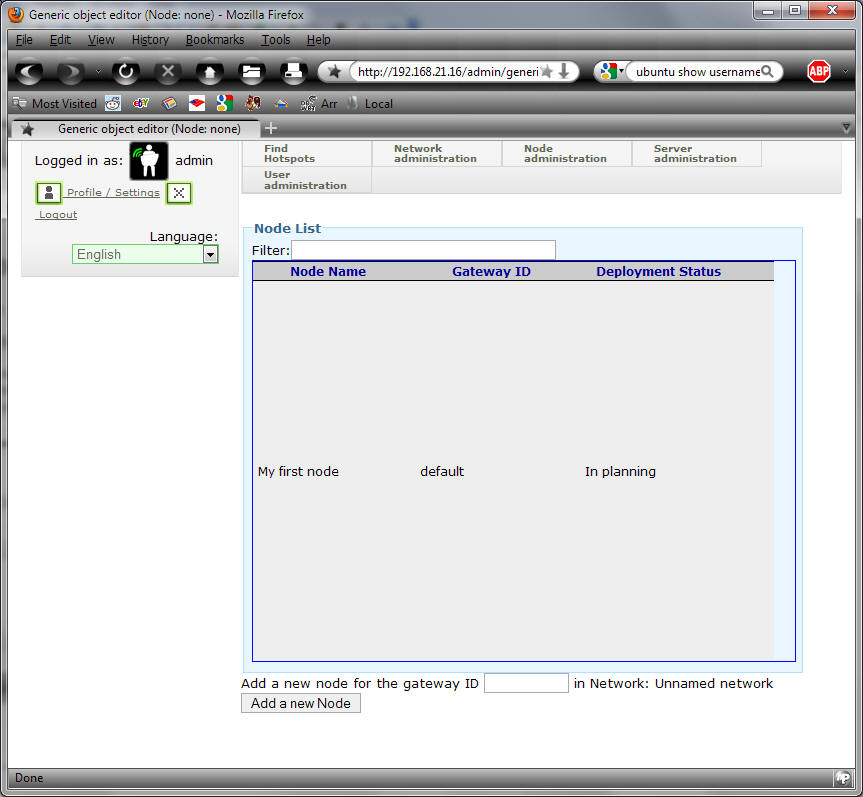
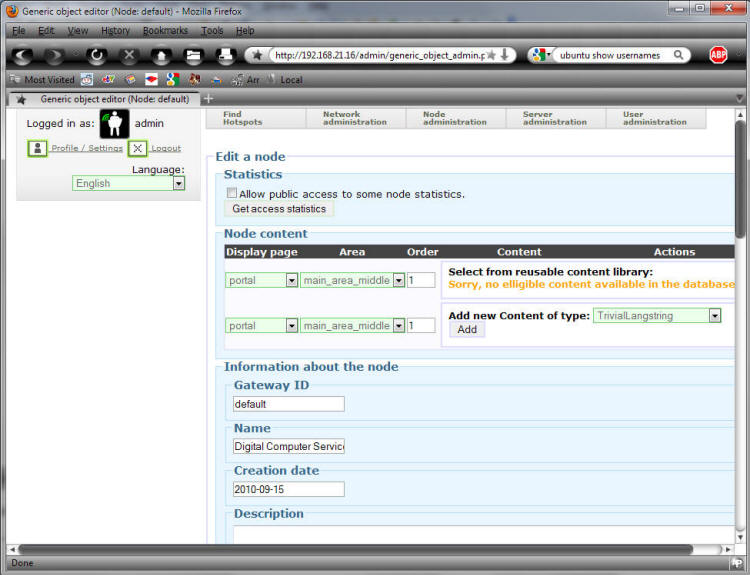
computer. WiFiDog applies a number of database schema updates. Click Next Create the admin user, enter a password and an email address WiFiDog will use ad the "from" address in the verification emails. Click Next. All Done! Move the install.php file so it can't be executed sudo mv /var/www/wifidog-auth/wifidog/install.php /var/www/wifidog-auth Configuring the Auth Server Log in using the admin account you just created. Select Node Administration / Edit Nodes from the menu
Click on My First Node
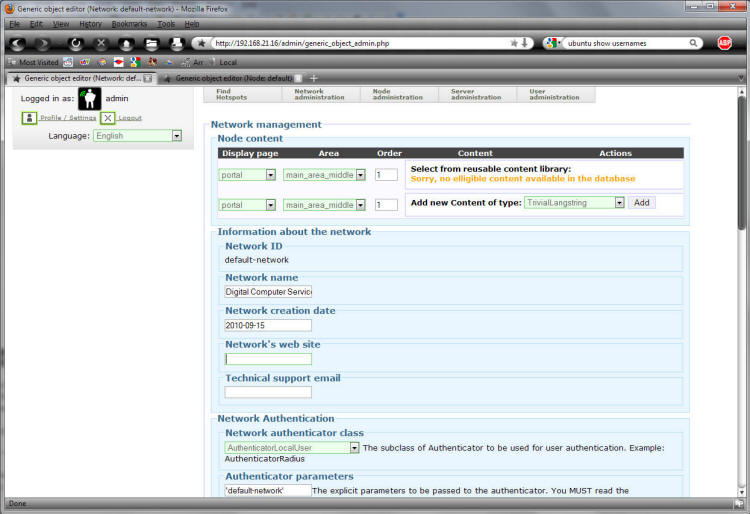
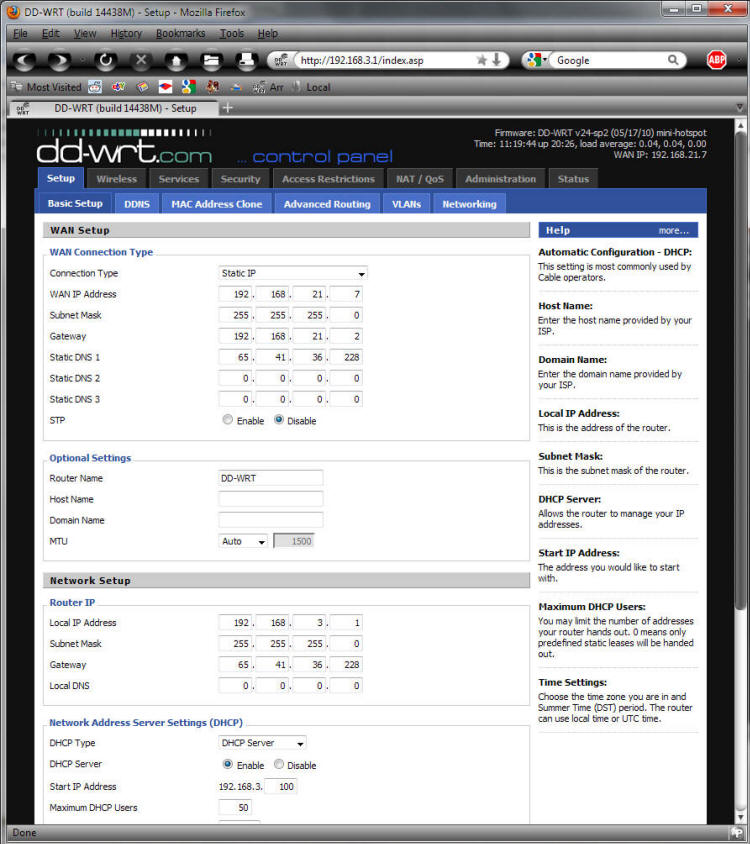
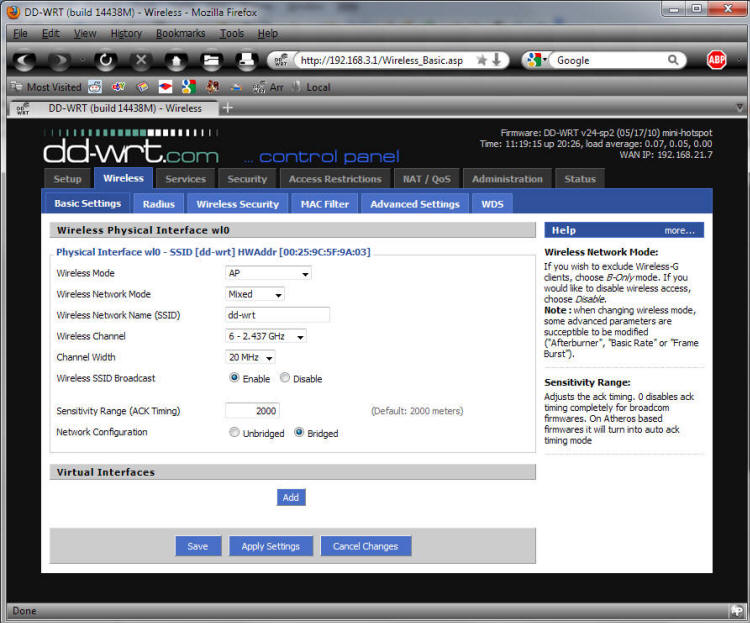
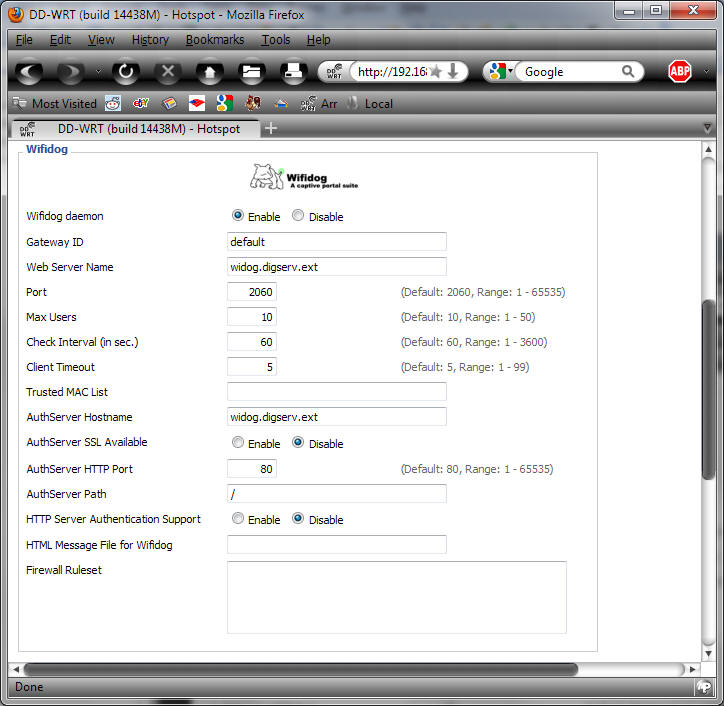
Fill out the form. The Gateway ID must match the ID we use in the dd-wrt gateway. Civic number is the number part of the street address. Set the node status to testing. Click "geocode the postal code or address above" to get the lat / lon of your location. Write these down we will need them in the next step. Click Save node at the bottom. Now select Network Administration / Unnamed Network from the menu. Enter network name, web site. Do not change network authentication. Enter the validation email, turn off case sensitivity for usernames. Enter the lat / lon from the previous step and 12 in the zoom level. Click Save Network. Our server is now configures to run the WiFiDog auth server. Configure the DD-WRT WiFiDog GatewayI am not going to cover the steps of configuring DD-WRT as they are covered in the DD-WRT wiki and forum. You do need to have the router configures as an access point. I chose to have the WAN network use a static IP configuration. Here is the WiFiDog Setup. Enter the server that you just configures in the "Seb Server Name" and "Auth Server Hostname". A couple of important things: You must put a slash in the AuthServer Path field. if you don't you will get malformed URI's to the Apache server for the heartbeat (and other things I assume). After you enter the WiFiDog parameters you must reboot the router for them to take effect. Now lets look for the heartbeat from the gateway in the apache log file. There should be an entry every minute. sudo nano /var/log/apache2/access.log 192.168.21.7 - - [15/Sep/2010:11:26:20 -0400] "GET /ping/?gw_id=default&sys_uptime=73984&sys_ memfree=16324&sys_load=0.02&wifidog_uptime=73968 HTTP/1.0" 200 214 "-" "WiFiDog 20090925" If there is a problem with the URI it will show up in the error log. sudo nano /var/log/apache2/error.log [Wed Sep 15 11:39:31 2010] [error] [client 192.168.21.7] Invalid URI in request GET ping/?gw_id= default&sys_uptime=20&sys_memfree=17904&sys_load=0.58&wifidog_uptime=3 HTTP/1.0
|

Web design, graphics and photographs Copyright © 1995-2017 W. James Musson All Rights Reserved Worldwide See Terms of Use |